
After several months of chaos, I am back in the saddle again. My garden has suffered from my time away and I will give you an update on everything next week. This week we are going to be talking about my experiment with my new composting system.
Theory Behind Composting System
The basis of this is a Johnson-Su bioreactor. I live by myself so I produce nowhere near enough green or brown waste to run an actual bioreactor. Though I could still use the principles to build something that should still work on a smaller scale.
The main takeaway as concerned with the design principles of my composting system is you want to keep air within a foot of any part of the compost. So we need something that can pass air throughout it. We will also need tubing to put in the center to allow air to go through the center of the compost pile to keep less than a foot rule intact.
Basic Construction
The basic construction principles is a cage lined with landscaping fabric with PVC tubes put in the center in order to create tube holes in the compost pile. Normally, these tubs can be pulled out after a couple of days as things…um…gel and they will hold their shape. For easy of movement, you put in on a pallet.
These things can be huge, like lay on top of one huge. Mine won’t be because I produce nowhere near enough waste. I also need to figure out how to handle the center columns since I will not have enough gel-able materials to keep the center open.
Watering and earthworms are handled differently too. Normally, you add watering systems and earthworms to colonize the pile.
My Test Design
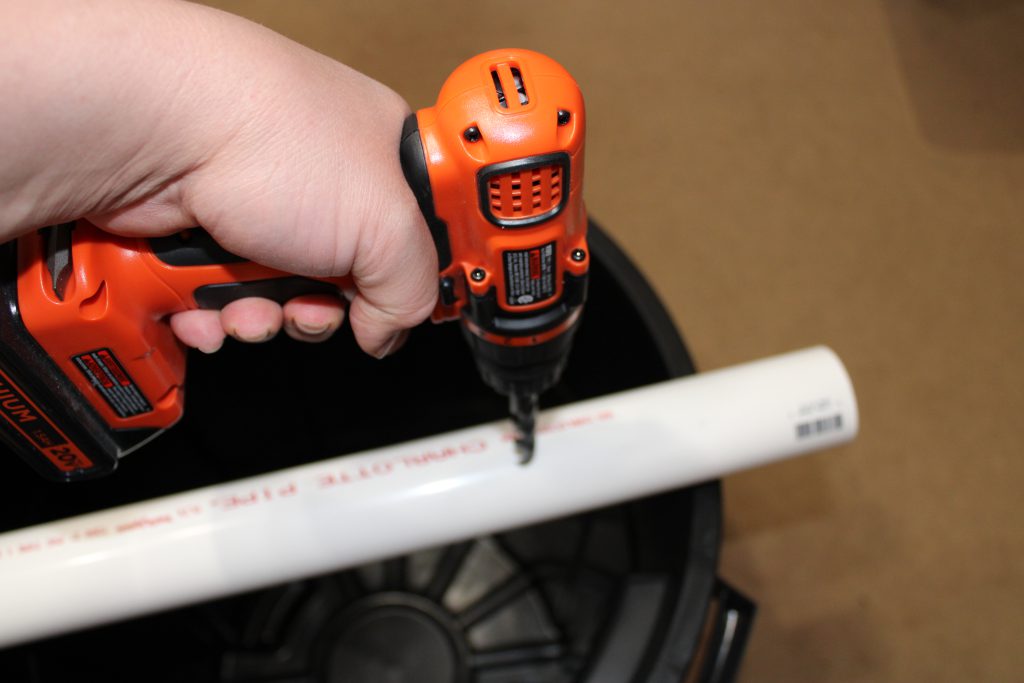
Instead of a cage and landscape fabric, I am using a plastic trashcan. I am sticking with PVC pipe but using much smaller pipe since my pile is much smaller.
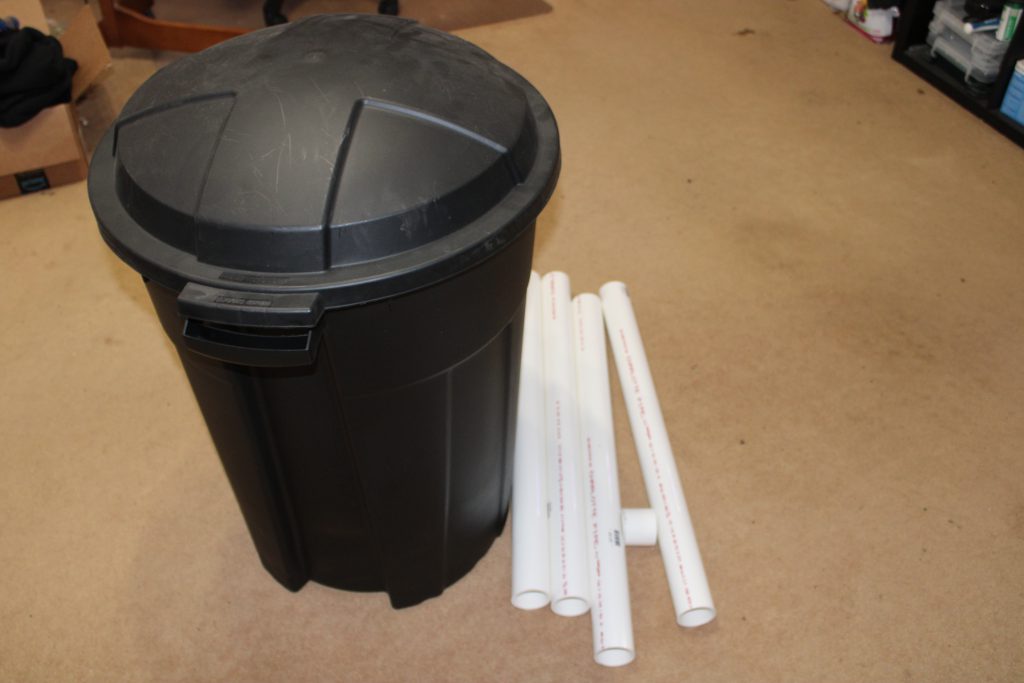
As I recall, this is a 55 gallon trash can with 2 inch pipe. It was quite the comical sight as I had to cut this 20 ft pipe into roughly 5 ft sections out in the parking lot. I stuck the pipe into the trashcan then took PVC cutters and did a notch cut roughly at the top of the can. Then I used to cart return to give me a work surface and finished the cut.
I am so glad this worked out because my little car was pretty much filled with the trashcan.
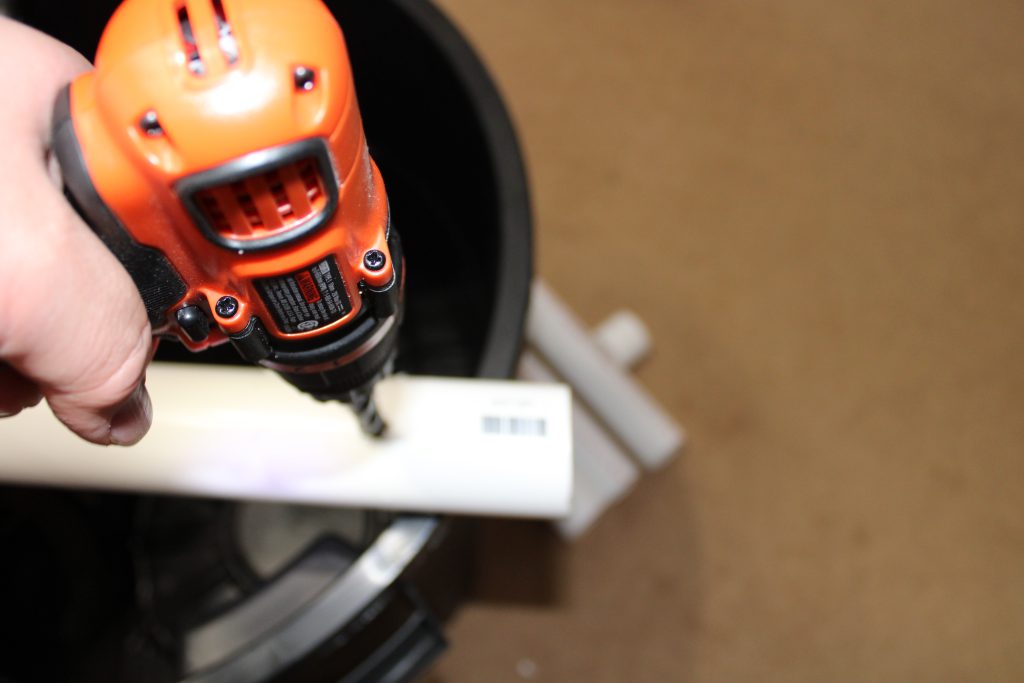
Here is what each pipe should look like.
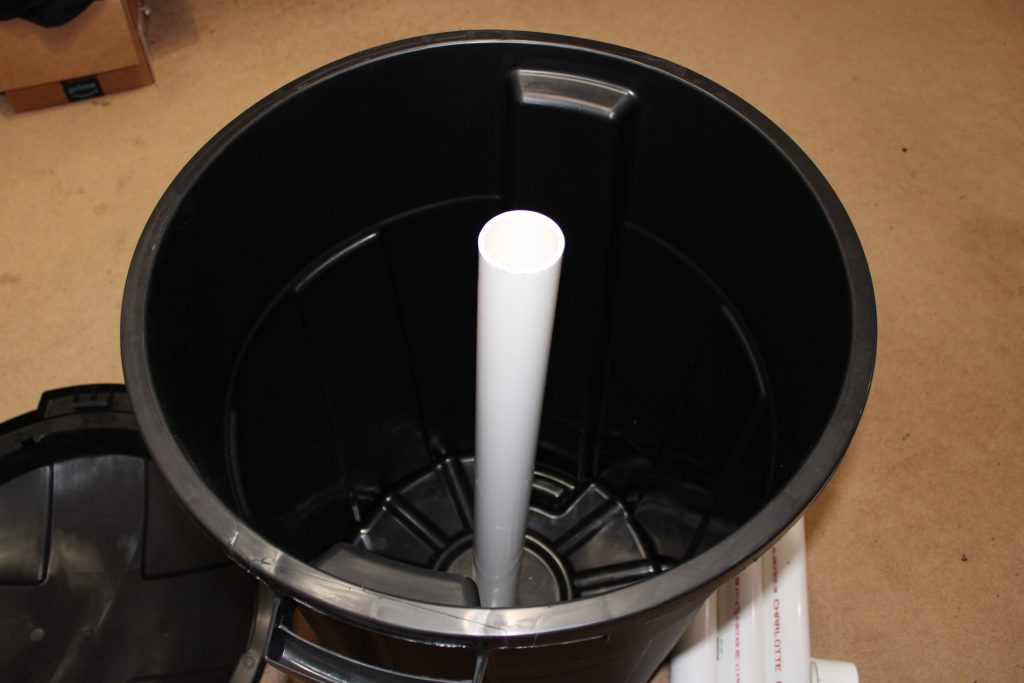
One item you want to check, when choosing a pipe, is it must be under a foot from the edge. Mine was 9 inches.
Since most trashcans are rather air and watertight, I need to make some holes. While it would be more fun to take it out to the range, I wanted to do something a bit more precise and focused.
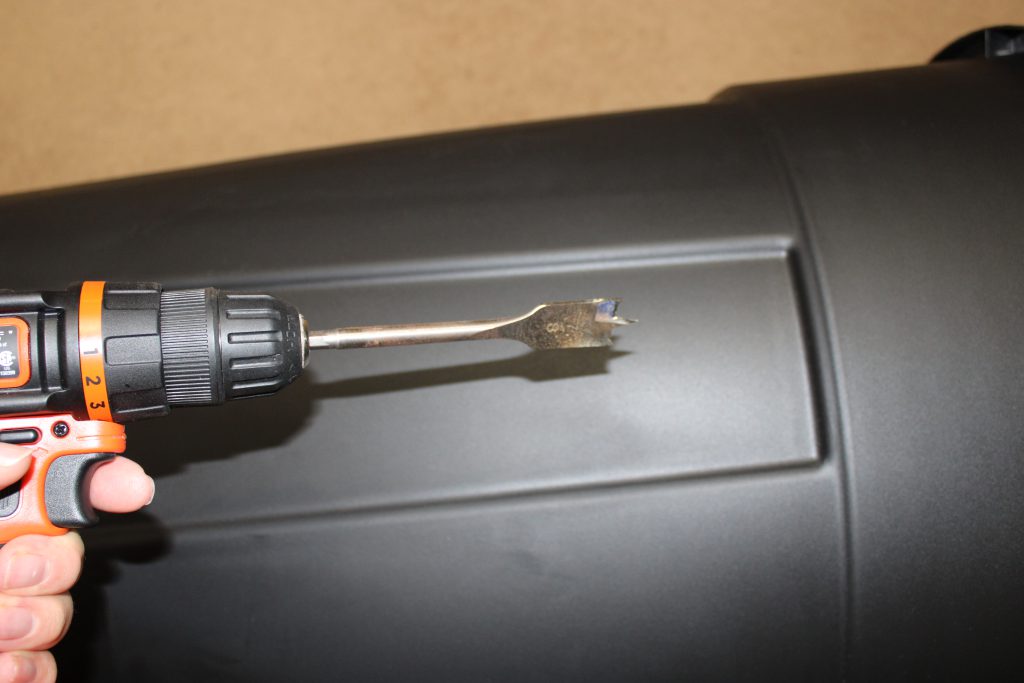
Pipe
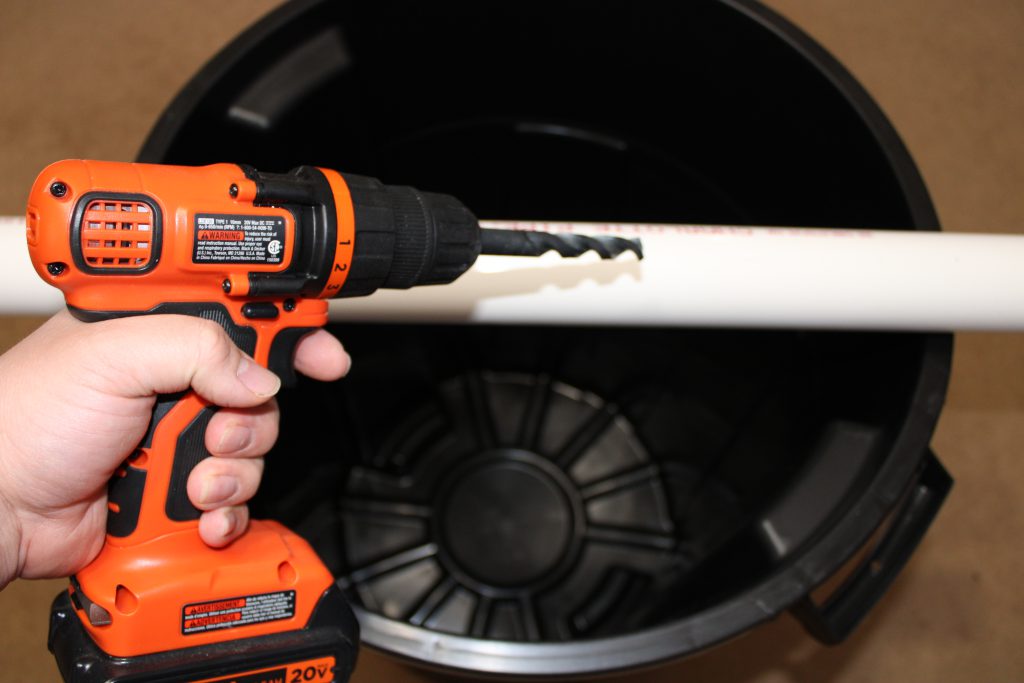
Since this is going to be a permenant fixture in the composting system, we need to focus on making sure we have hole every few inches to make sure we stay under the 1 foot requirement.
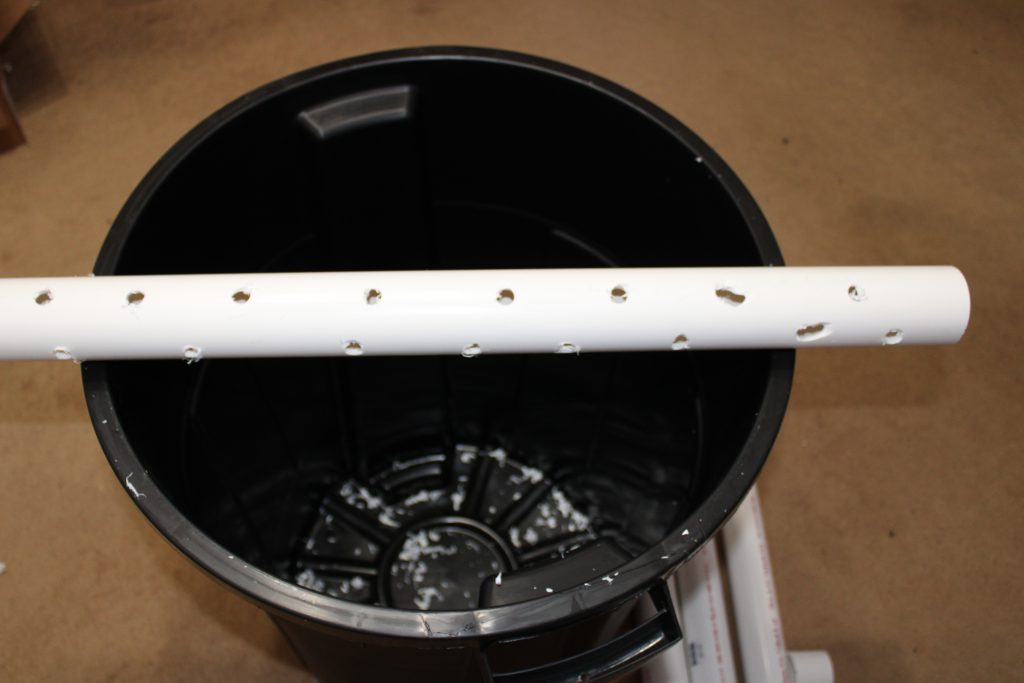
This is a time for some serious eye protection. I had plastic flying all over the place when I was doing the drilling. While most of it stays in the can, not all of it will.
Now it is time for the can.
Can
Here is where I screwed up. My first holes, which are on the bottom, were done with a 1.5 inch paddle bit. I really should have done something under an inch. When I saw the size of the holes, I realized I was begging for critters to get into the composting system.
If I was doing this again, I would use 7/8″ paddle bits in the future.
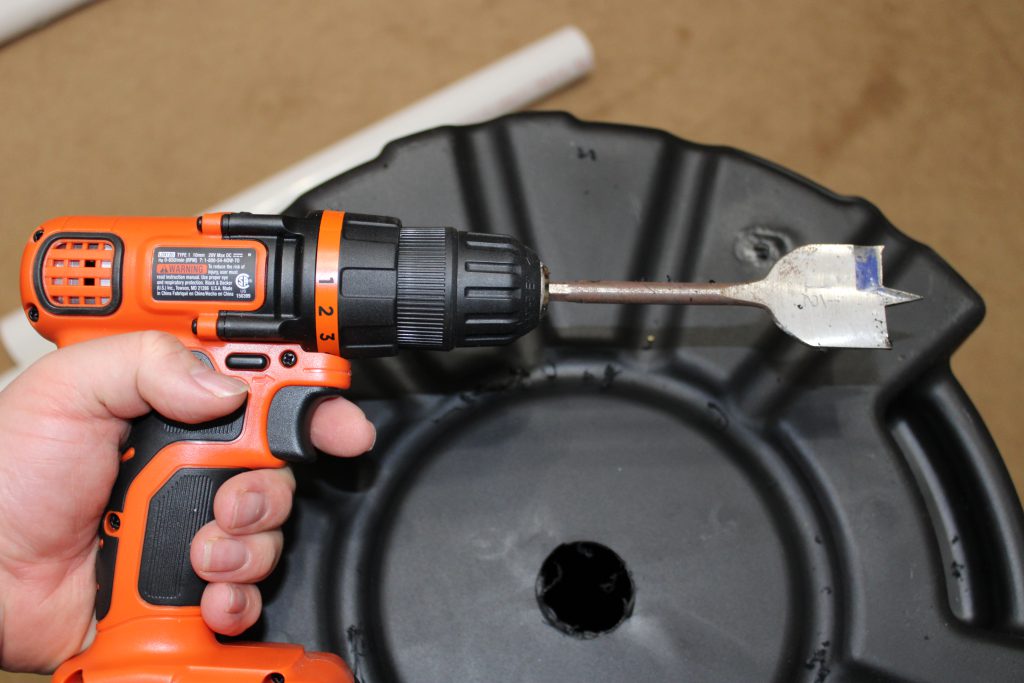
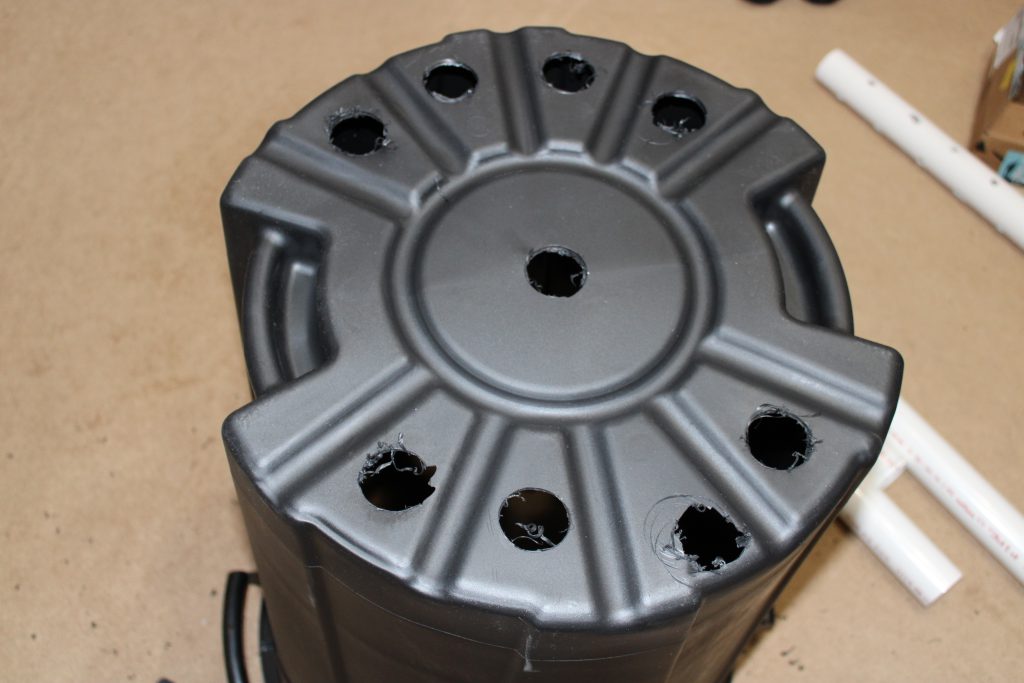
I generally wanted to stay out of the more structural feeling parts of the can with my drill bit. It might have been paranoia but I don’t want a half composted can breaking on me, if I move it.
With the proper bit for the sides, I am going to drill a bunch of holes. Remember, we want lots of air circulation.
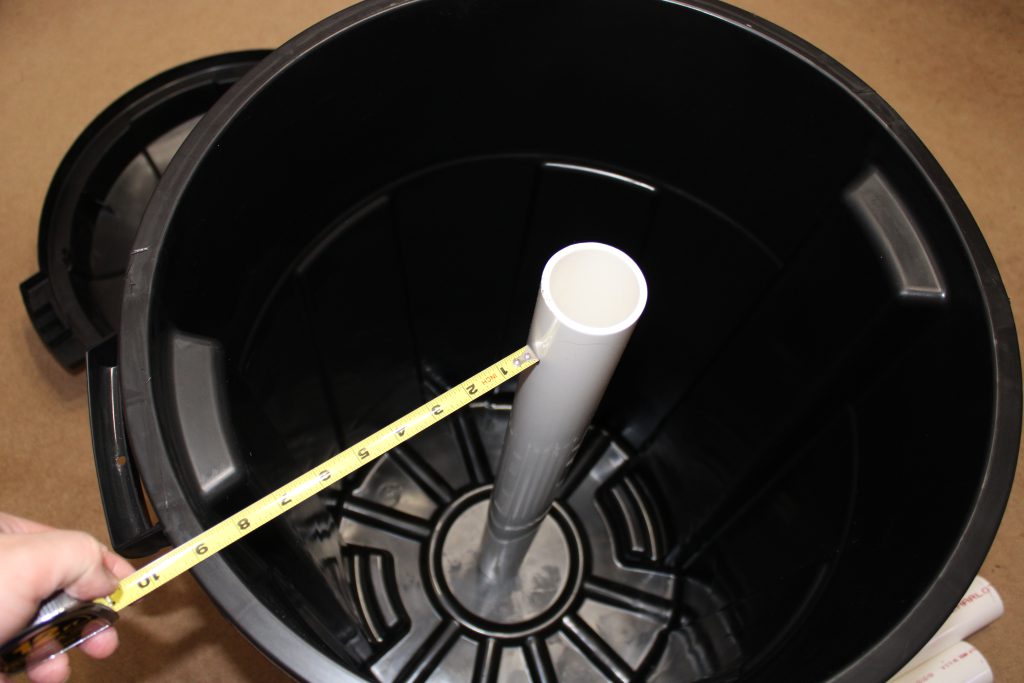
I used a tape measure to check the distances involved in my can.
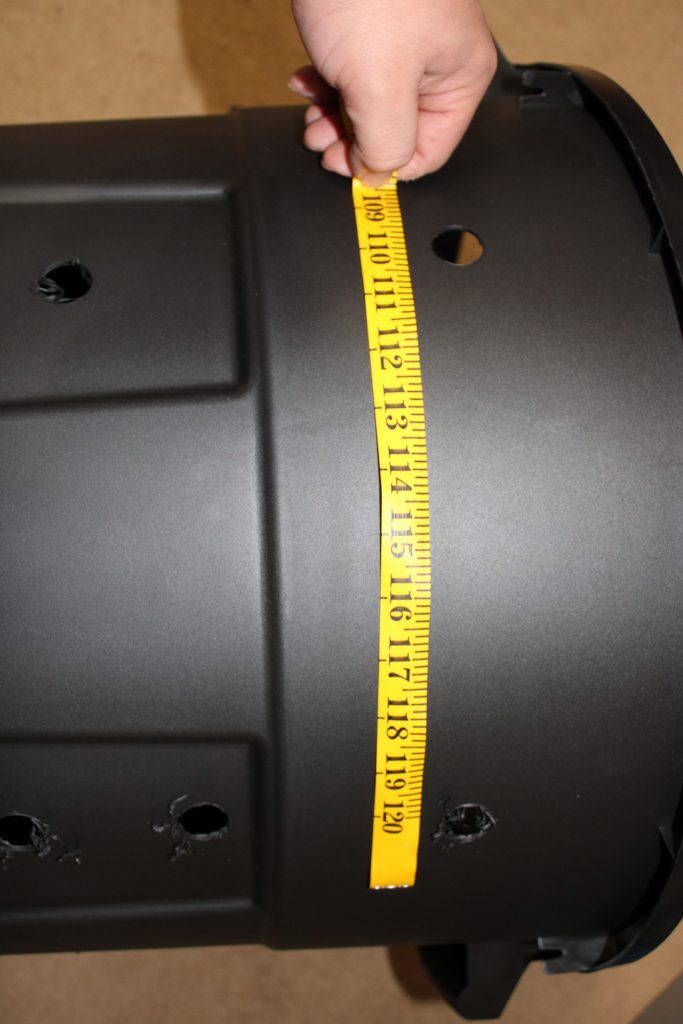
The longest distance is 10 inches so we are in good shape. If I was doing this again. I would add additional holes to to top layer and do them on two alternating rows.
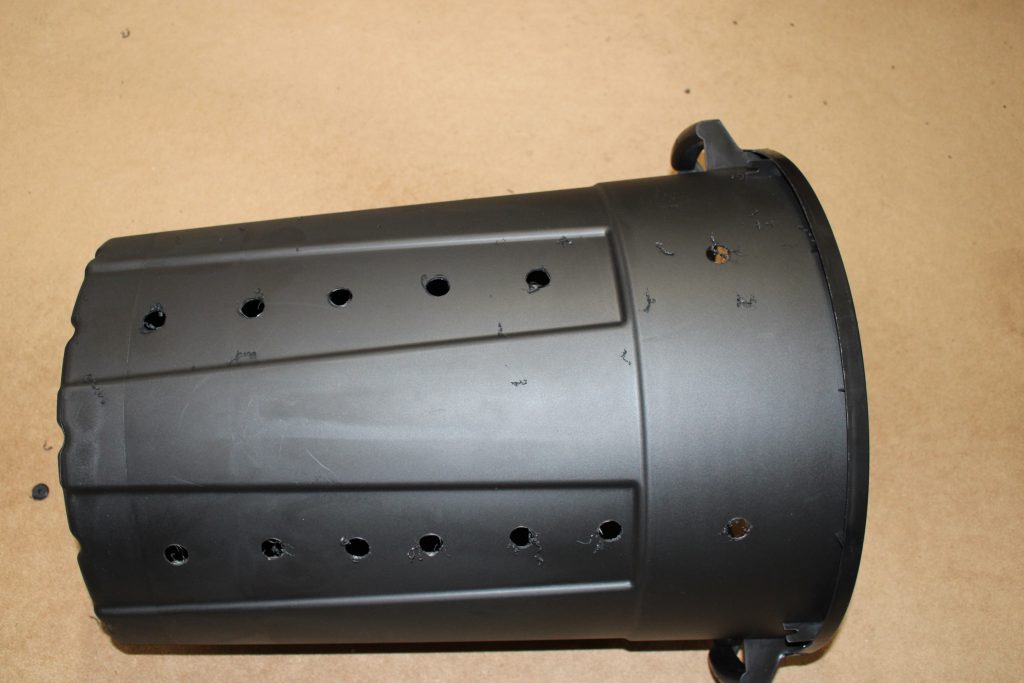
Here is the drilled can.

Filling Up the Can
Now it is time to fill the can up. I have my garden waste from last year that needed to be processed.
Smaller bits compost fast then big bits so I got my wood chipper. Wood chippers are fun after all.
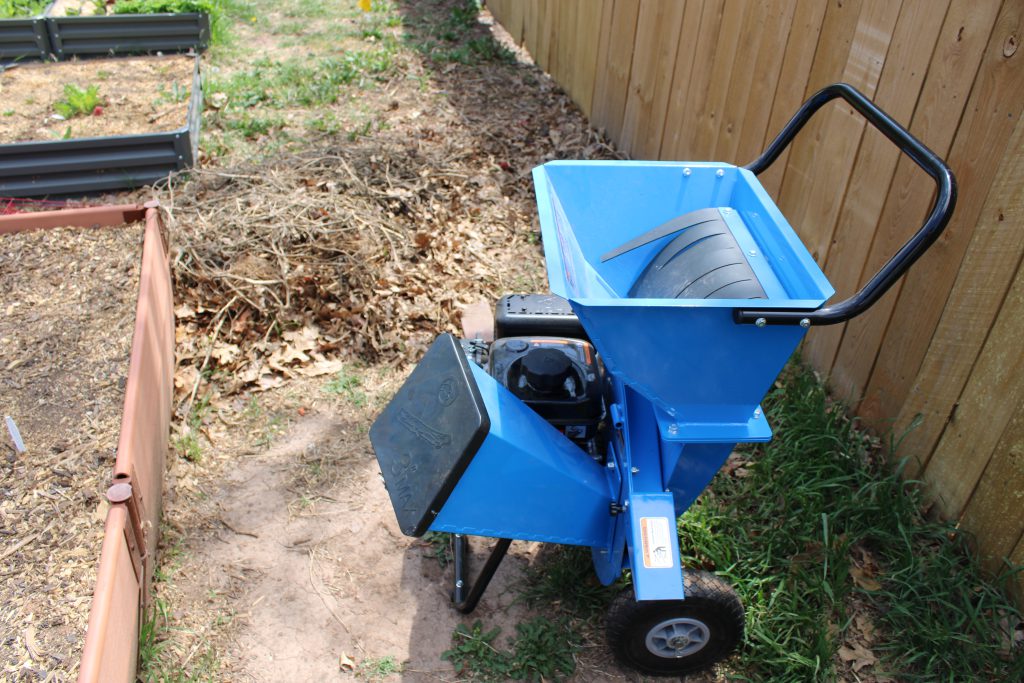
It was fun but the wood chipper did a little too good a job. All the debris came out as dust and on the plains that means it was just dust in the wind.
Use your lawn mower. It will not do as good a job and in this case, that is a good thing.
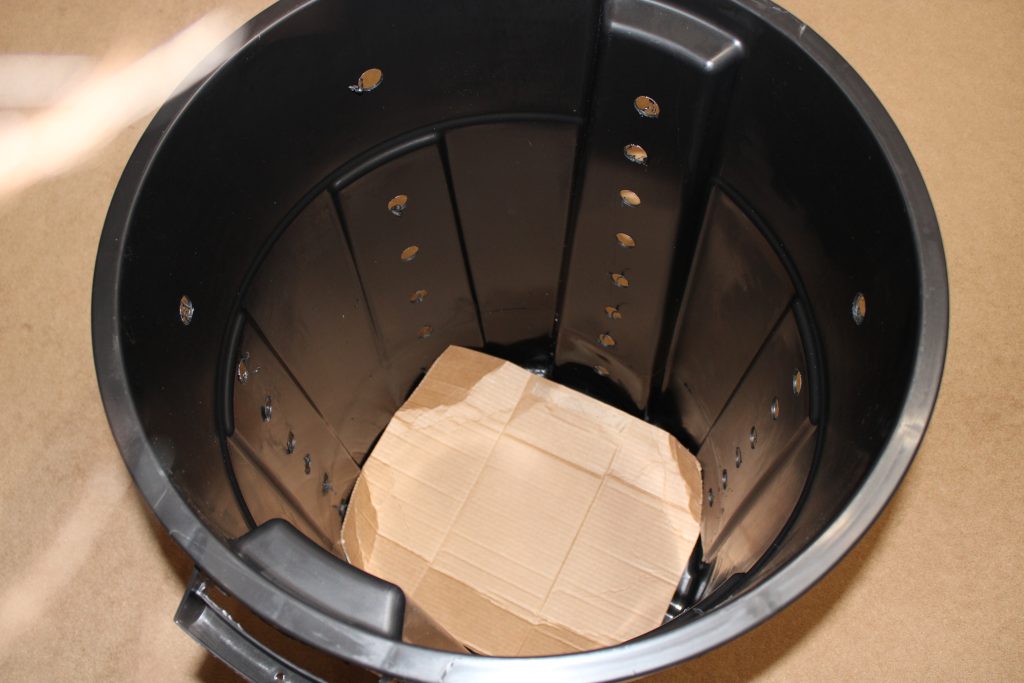
Lets prep the can. I stuck some cardboard on the bottom to help keep things in on the initial fill. It is biodegradable and the earth worms will work through it pretty quickly.
Get the center pipe aligned and start loading. The pipe will move around, just do your best to keep it centered.
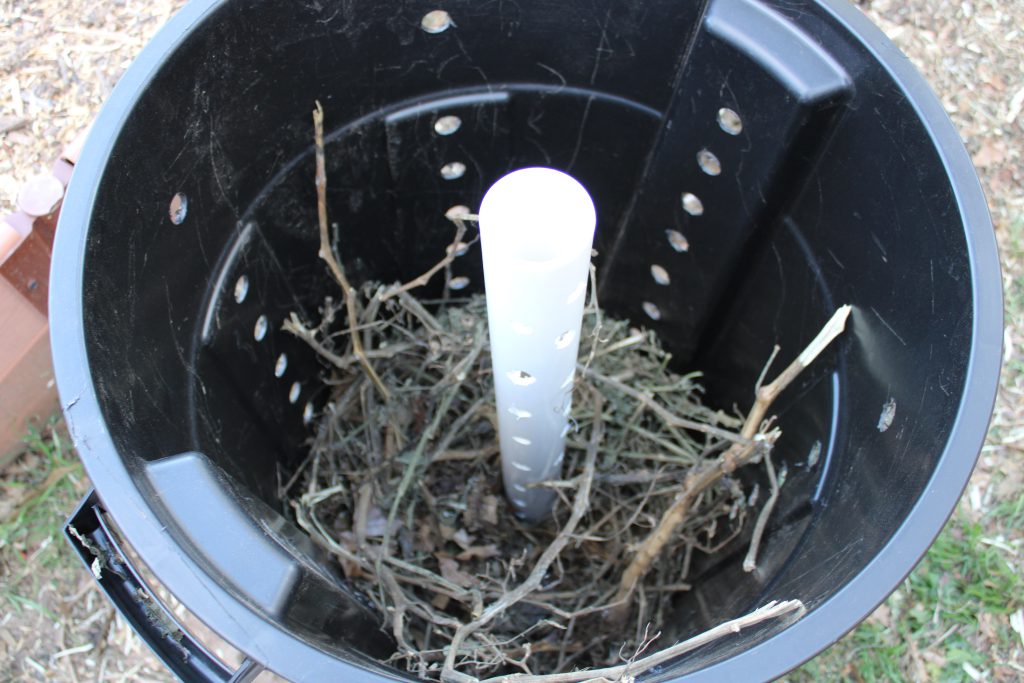
You also want to layer your browns and greens as you load it. Here are some Anaheim chilies skins, old store lettuce and random bits of stuff that will go in next.
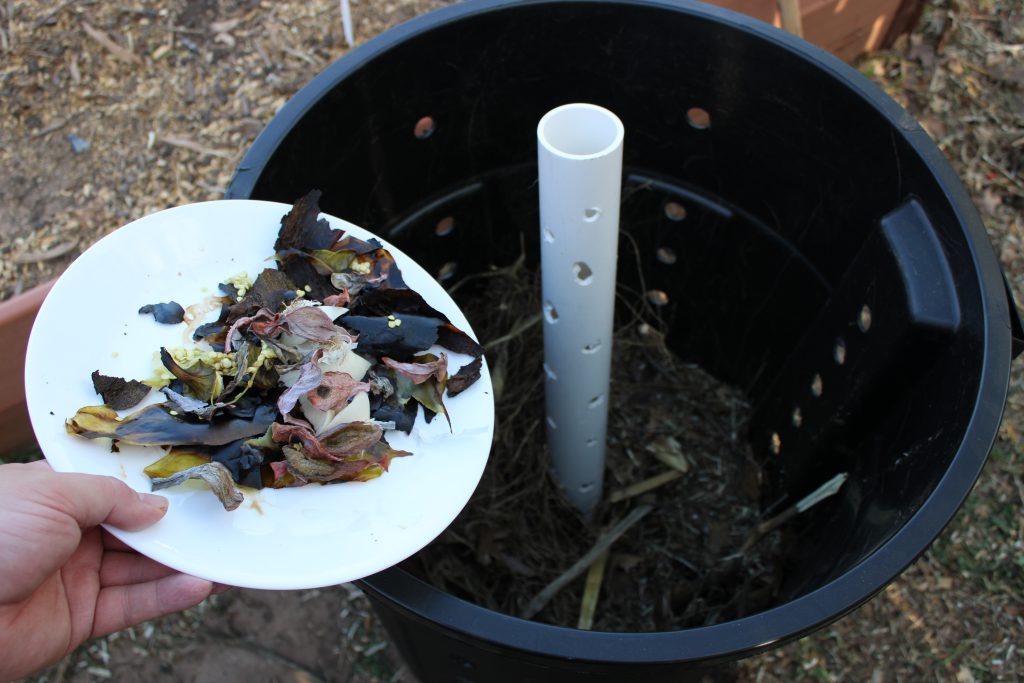
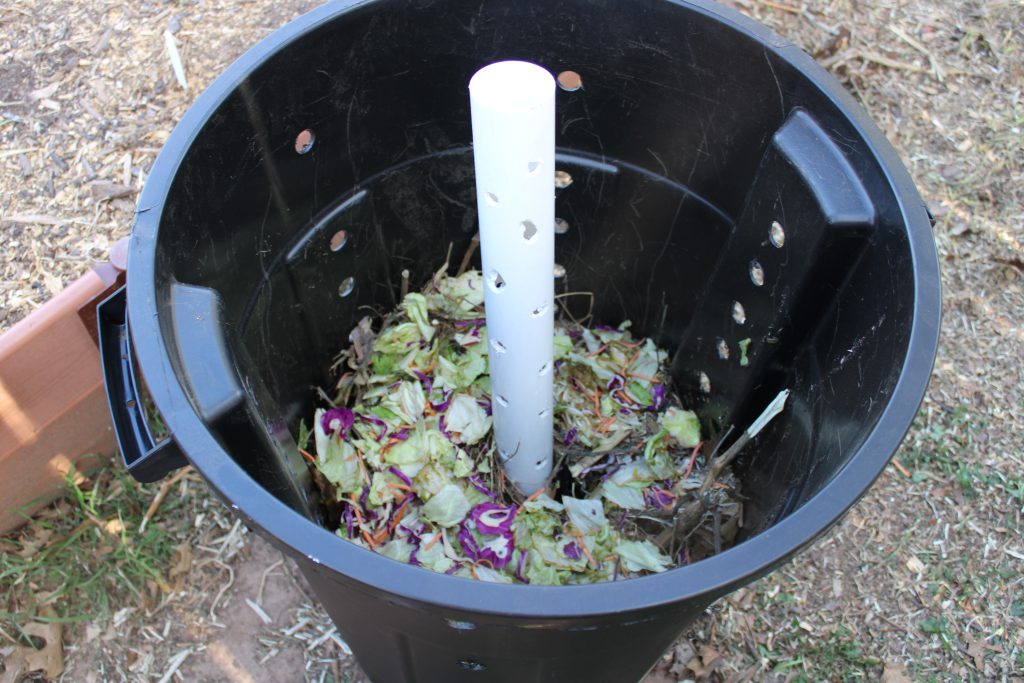
Then add some more browns and so on until you get to the top.
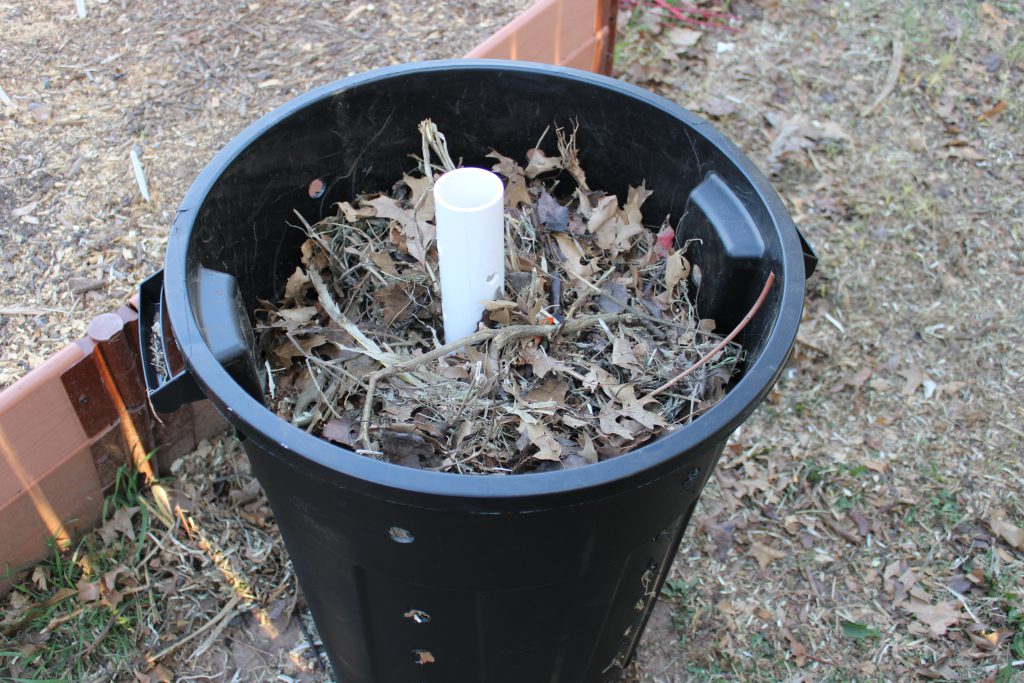
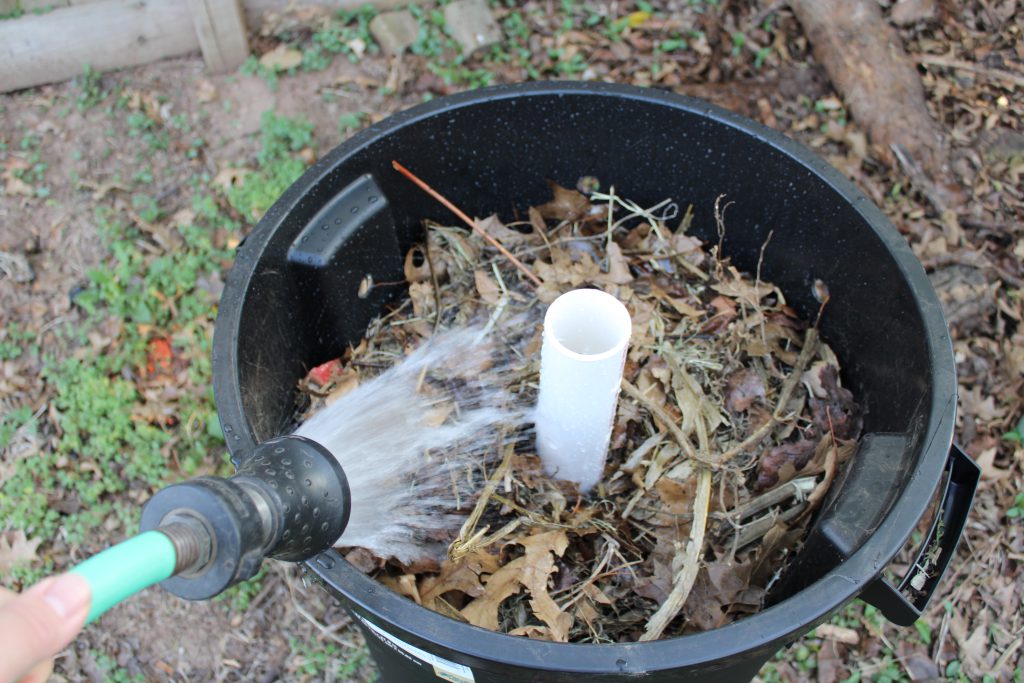
Finally give it a good watering and slap on the lid.
Differences Compared to Johnson-Su
There are a couple of difference between the bioreactor and what I am doing. Most of the Johnson-Su bioreactors have watering system to keep things moist.
Because of the plastic can, I don’t think I will have moisture retention issues. The airflow will never be as good as the landscaping cloth used for letting moisture escape.
I use my coffee and tea waste along with the water to provide water to the can. So far it has worked well. I also have the can shaded from afternoon sun so that I might not create a furnace in the can.
The other major differences are the lack of a pallet and the addition of worms. I put the can down on the ground so that there is easy access for the worms in my soil to migrate into and out of the can. This can is also small enough that I can move it so I did not see an advantage to making the design anymore complicated.
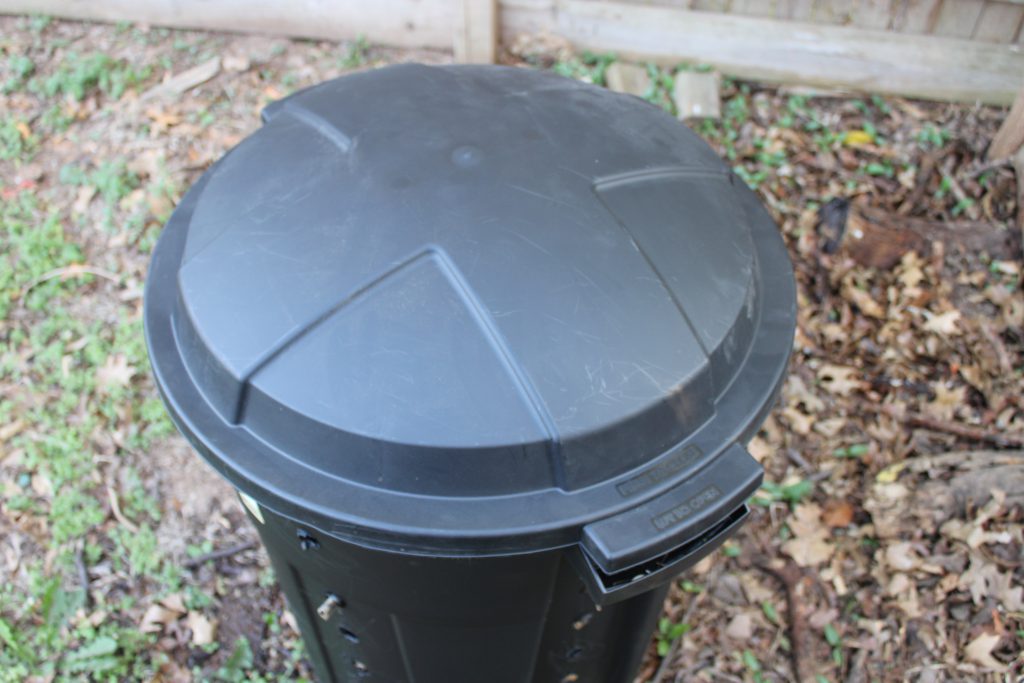
Personally, I like the tight fitting lid of my particular trashcan design. It keeps it on even the gustiest of winds so if you have conditions like I do, make sure your can fits those concerns when picking your can for the composting system.